Private Editor
Xapi private editor can be used by all users that sign in with Xapi. API designing with unique features is facilitated. You can access the private editor by opening an API in Xapi.
File support
The OpenAPI Specification OAS defines a standard, language-agnostic interface to HTTP APIs which allows both humans and computers to discover and understand the capabilities of the service without access to source code, documentation, or through network traffic inspection. When properly defined, a consumer can understand and interact with the remote service with a minimal amount of implementation logic.
The OpenAPI Specification OAS enables exactly this transfer of knowledge from API provider to API consumer. It is an open standard for describing your APIs, allowing you to provide an API specification encoded in a JSON or YAML document. It provides a comprehensive dictionary of terms that reflects commonly understood concepts in the world of APIs, embedding the fundamentals of HTTP and JSON. When teamed up with supporting tools it can provide a rich experience based on a simple document.
Xapi editor supports open API specification 3.1.0 only and supports both JSON and YAML.
OpenAPI Specification 3.1.0
OpenAPI Specification 3.1.0 is a vendor-neutral, open description format for HTTP including RESTful APIs. There are some major Changes in OpenAPI Specification 3.1.0:
- JSON Schema vocabularies alignment
- New top-level element for describing Webhooks that are registered and managed out of band
- Support for identifying API licenses using the standard SPDX identifier
- PathItems object is now optional to make it simpler to create reusable libraries of components. Reusable PathItems can be described in the components object. There is also support for describing APIs secured using client certificates.
Get Started
You can start creating your API by entering your API in the code editor or by importing the API.
To Create a New API Design
-
Log in to Xapi.
-
Select the organization either from the Profile icon or the All Organization screen.
-
From the API Catalogs drop-down, you can select either the Organization Catalogue or a Project Catalogue. Also, from the Organization Dashboard, you can directly create APIs.
-
Then click + Create and select API > New API.
-
In the New API window, fill in the following required fields.
Note: Fields marked with * are mandatory.
| Field | Description |
|---|---|
| Open API Version* | Select the open API specification version from the dropdown list. |
| API Version* | Enter the relevant API Version. |
| API Name* | Enter a name to this API. The name must be unique to the selected API catalogue. |
| Project* | If this API creates under a Project Catalogue, this field is pre-populated with the name of that project. Not editable. If this API creates directly from the Organisation Dashboard or the Organization Catalogue, then the dropdown loads all the projects available in the selected organisation. You can choose one project from the list. |
| Collection Path* | This field is auto-populated on the selection of the Project and API Catalogue. |
| Format* | Select a format from the following options: - YAML - JSON |
| Protocol* | Select a protocol from the following options: - REST - gRPC |
- Click Create. Your new API is created and displayed in the respective dashboard.
To Import a pre-designed API
-
Log in to Xapi.
-
Select the organization either from the Profile icon or the All Organization screen.
-
From the API Catalogs drop-down, you can select either the Organization Catalogue or a Project Catalogue. Also, from the Organization Dashboard, you can directly create APIs.
-
Then click + Create and select API > Import API.
-
From the Import API window, choose the preferred way from the following options to upload the pre-defined API file.
- Drag and drop
- Browse Note: Only the YAML and JSON file formats are allowed.
- Enter base API URL
-
Click Import. The New API window is displayed.
-
In the New API window, fill in the following required fields.
Note: Fields marked with * are mandatory.
| Field | Description |
|---|---|
| Imported API | This field displays the name of the given API file. If you want you can edit the name, but not allow to change the file. |
| Open API Version* | Select the open API specification version from the dropdown list. |
| API Version* | Enter the relevant API Version. |
| API Name* | Enter a name to this API. The name must be unique to the selected API catalogue. |
| Project* | If this API creates under a Project Catalogue, this field is pre-populated with the name of that project. Not editable. If this API creates directly from the Organisation Dashboard or the Organization Catalogue, then the dropdown loads all the projects available in the selected organisation. You can choose one project from the list. |
| Collection Path | This field is auto-populated on the selection of the Project and API Catalogue. |
| Format | Select a format from the following options: - YAML - JSON |
| Protocol | Select a protocol from the following options: - REST - gRPC |
- Click Create. The newly created API is displayed in the respective dashboard.
To View an API
In Xapi, you can view the APIs from different screens. The following guide describes viewing an API from the API Editor. From this option, you can view the important details related to the selected API.
-
Log in to Xapi.
-
Select the organization either from the Profile icon or the All Organization screen.
-
From the API Catalogs dropdown, select the relevant catalog. The Catalogue screen displays whatever API designs are available under the selected catalog
Also, from the Origination Dashboard by clicking the relevant project or API catalog can view the API designs. Or via the All Projects Dashboard and Project Dashboard, you can view the APIs by clicking the relevant project or API collection.
-
Click on the preferred API.
-
Click on the API version.
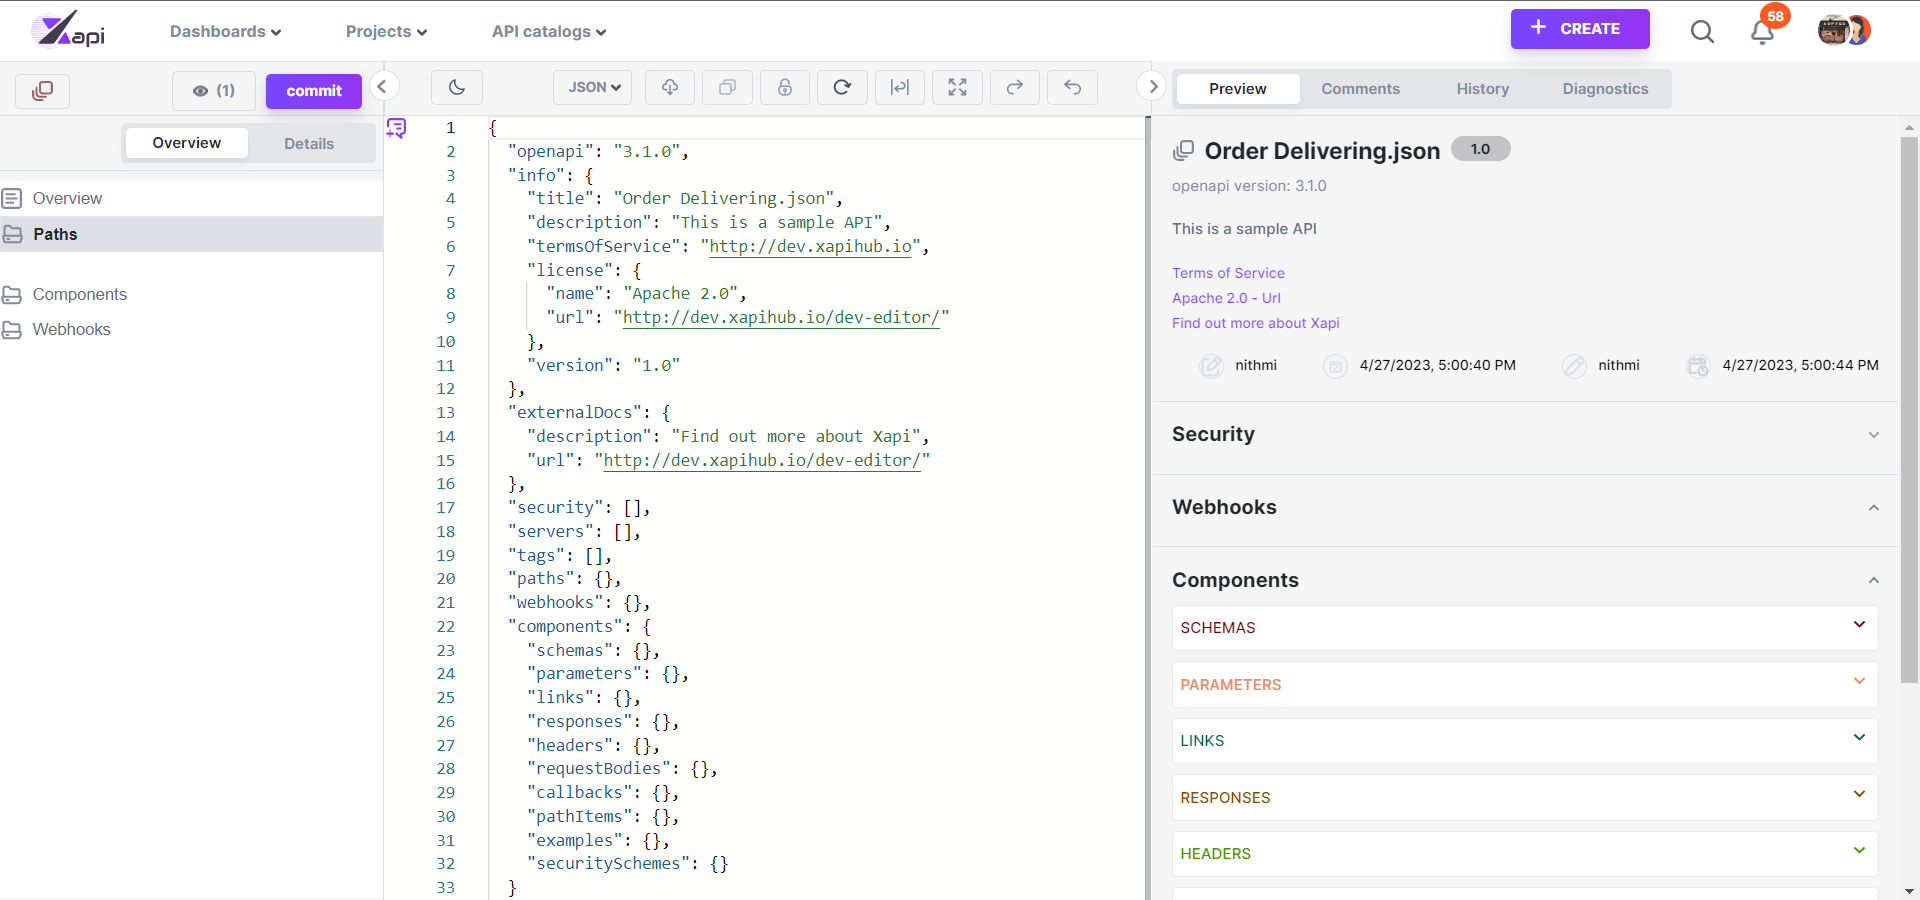
You are navigated to the API Editor screen, as shown.

Editing Tools
Xapi provides many Editing Tools which you can access from the top bar in the editing window.
You can:
- Put the Editor in View Only mode by clicking the lock icon.
- Refresh your Editor by the reload button which you can reset the code for any changes made or to get the latest changes.
- Put your code Editor into window view or line view through doc icon button.
- View your code Editor in full screen through full screen icon button.
- Turn to Dark mode or Light mode by clicking brightness icon.
In the code editor auto complete is provided for some key words.
File conversion
You can Convert JSON to YAML or YAML to JSON by clicking the left side drop down button then select the structure you desire. That button indicates the current file structure, if the API is JSON, then displayed as JSON and if it is YAML then YAML is displayed.
API Comments
To Add Inline Comments to APIs
Xapi allows you to add inline comments to APIs and tag project members.
-
Log in to Xapi.
-
Select the organization either from the Profile icon or the All Organization screen.
-
From the API Catalogs dropdown, select the relevant catalogue. The Catalogue screen displays whatever API designs are available under the selected catalogue.
Also, from the Origination Dashboard by clicking the relevant project or API catalogue you can view the API designs. Or via the All Projects Dashboard and Project Dashboard, you can view the APIs by clicking the relevant project/ API collection.
-
Click on the preferred API.
-
Click on the API version.
You are navigated to the API Version Tooling page.
-
Select the relevant code context to be commented on.
-
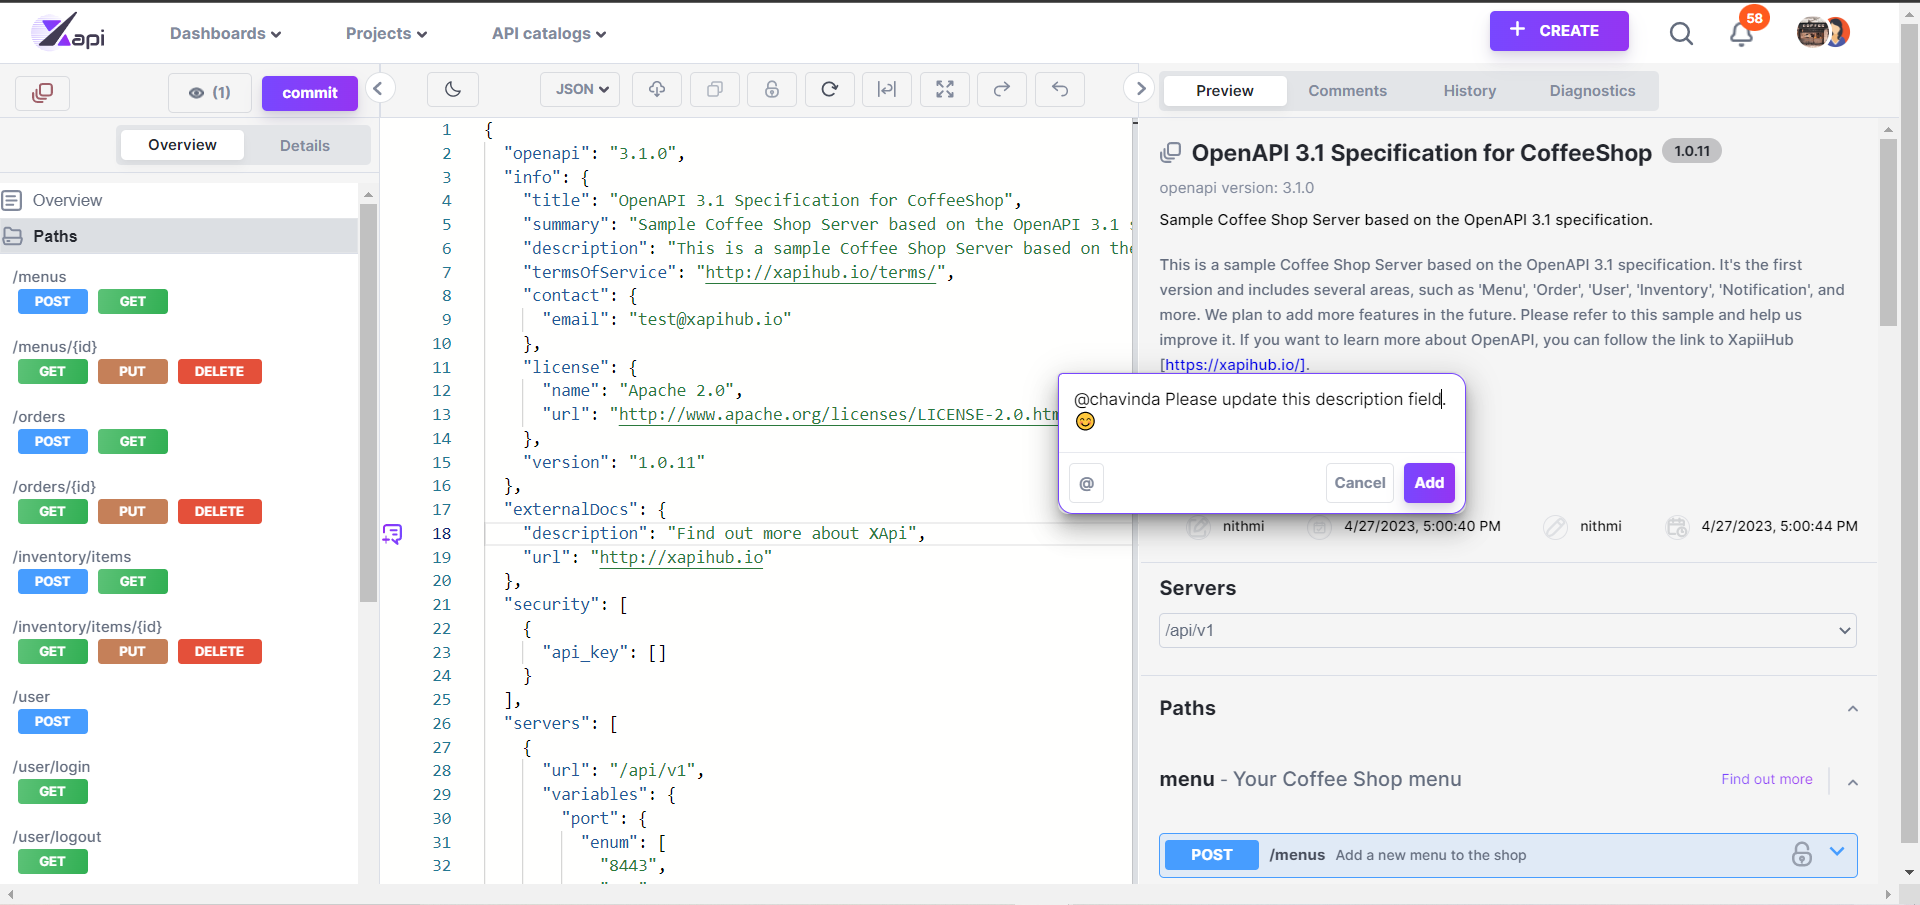
From the upper right bar click Comments. A Comments icon appears on the screen, as shown.

-
Click on the Comment icon.
-
In the resulting text box, enter the inline comment. By clicking the @ icon, you can tag a project collaborator. E.g. @Name Comment.
-
Click Add.
A success message is displayed.
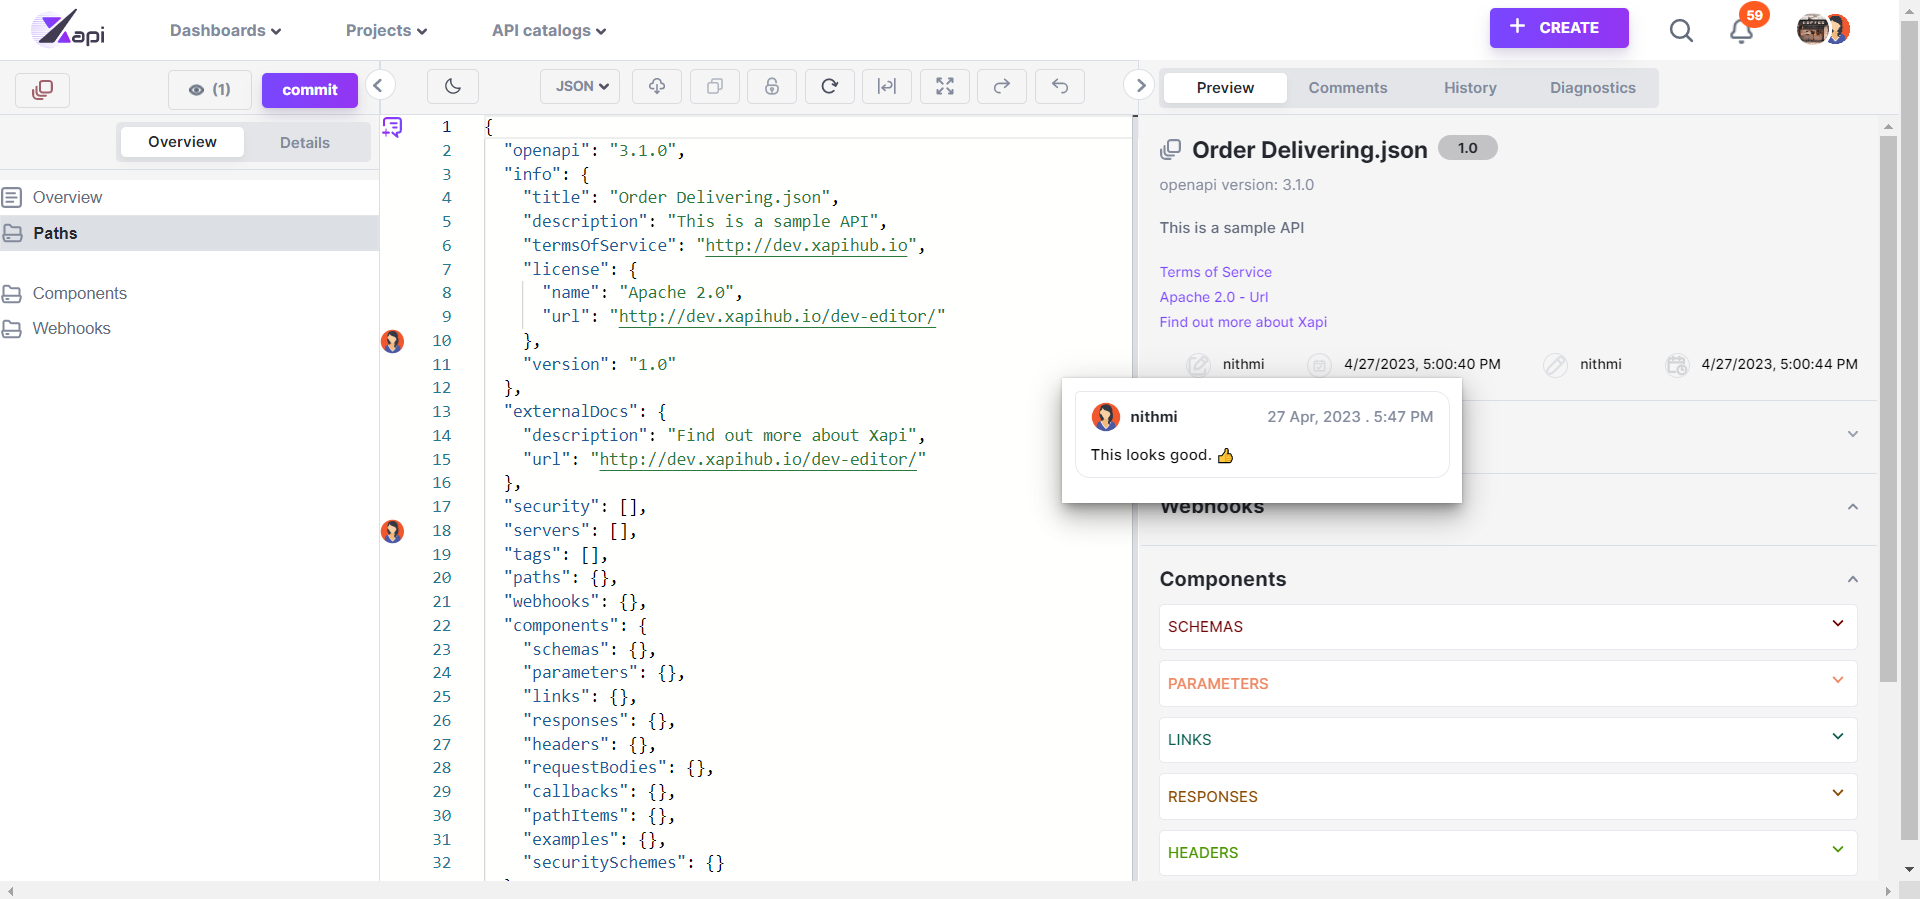
Also, the comment icon is changed to a profile icon. By clicking that icon, you can view/edit the added comment.
The resulted text box displays the commented author’s name, date, and time along with the comment. See the following image.

Furthermore, you can view the added comments under the Comments section.
The tagged member will be notified via a clickable notification that includes the details of the respective API.
If you are the API Reviewer, the system will display the added inline comment details on the Activity Stream of the corresponding API designer or the tagged user.
If you are a Project Member, the system will display the added inline comment details on the Activity Stream of the corresponding project members or the tagged user.
To Resolve API Inline Comments
In Xapi, you can resolve inline comments added to the APIs by collaborating or rejecting the changes mentioned in the comment. Also, you can provide feedback in the same inline comment.
-
Log in to Xapi.
-
Select the organization either from the Profile icon or the All Organization screen.
-
From the API Catalogs dropdown, select the relevant catalogue. The Catalogue screen displays whatever API designs are available under the selected catalogue.
Also, from the Origination Dashboard by clicking the relevant project or API catalogue you can view the API designs. Or via the All Projects Dashboard and Project Dashboard, you can view the APIs by clicking the relevant project/ API collection.
-
Click on the preferred API.
-
Click on the API version. You are navigated to the API Version Tooling page.
-
Click the Comments tab or the Comments icon. The Comments section or Comments text box displays the comment context and other details of the comment.
-
Follow the below steps as required.
- Click the Thumbs-up emoji for a positive response.
- Click the Thumbs-down emoji for a negative response.
- Click the Edit button to add a new comment.
- To Close the comment, from the horizontal ellipsis select Delete. After the changes are done, from the horizontal ellipsis, select Resolve. A success message is displayed.
All the project collaborators attached to the comment thread will be informed via a clickable notification that includes the details of the respective API.
Watch List
To Add the User Account to an API Watch List
From this option, you can add your user account to an API Watch List having the purpose of receiving notifications related to the changes of the selected API.
You are allowed to add yourself to the watch list if you are a project member or organization member of the selected project.
-
Log in to Xapi.
-
Select the organization either from the Profile icon or the All Organization screen.
-
From the API Catalogs dropdown, select the relevant catalogue. The Catalogue screen displays whatever API designs are available under the selected catalogue.
Also, from the Origination Dashboard by clicking the relevant project or API catalogue you can view the API designs. Or via the All Projects Dashboard and Project Dashboard, you can view the APIs by clicking the relevant project / API collection.
-
Click the preferred API.
-
Click on the API version. You are navigated to the API Editor page.
-
Click Start Watching.
Note: If you are the organization owner or admin, the system will display the list of members who are already on the Watch List.
Tip: By clicking the Stop Watching button, you can remove your account from the respective API Watch List.
To Remove the User Account from an API Watch List
From this option, you can remove your user account from the respective API watch list having the purpose of blocking the API notifications.
-
Log in to Xapi.
-
Select the organization either from the Profile icon or the All Organization screen.
-
From the API Catalogs dropdown, select the relevant catalogue. The Catalogue screen displays whatever API designs are available under the selected catalogue.
Also, from the Origination Dashboard by clicking the relevant project or API catalogue you can view the API designs. Or via the All Projects Dashboard and Project Dashboard, you can view the APIs by clicking the relevant project/ API collection.
-
Click the preferred API.
-
Click on the API version. You are navigated to the API Editor page.
-
Click Stop Watching.
Note: *If you are the organization owner or admin, the system will display the list of members who are already on the Watch List.
Left Menu
Overview
In the overview of the editor, you can use Left Menu for navigating the code editor and visual editor by clicking the required paths or components. In path level summary and description can be rendered.
Commit
Create your API in the editing area. When you are ready to save your API. Press the commit button in the top left. Then provide commit name and description and commit changes.
Xapi takes a list of commits that have done in the API and provides information of past commits.
Status Change
The status of the API can be changed of the API through Kanban ticket, If the Kanban board is disabled of the project the API is created then the status of the API can be changed through the editor.
You can change assignee in the editor from left side Assignee field then select an Assignee or you can unassign as well.
Statuses to change in API’s are: To do, Design In progress, Review in Progress, and Done.
To Do to design in progress and design in progress to review in progress can be changed by admin, owner, API reviewer, and API Designer.
Review in progress to done cannot be changed by API designer. After done status, cannot go back to review in progress status. In review in progress and done the commit button is disabled.
Preview
All the things of the API are visually rendering in real time in the Preview. In the info section, which is the top section, you can view all the details of the API.
Security
In the security section the security schema is defined under components. All the Security which are defined under components are displayed here as a global security level.
When security is provided to an operation it indicates from a dark lock icon if not a transparent lock icon.
All the defined security types and versions are displayed here. Under http basic and bearer forms are available.
Under oauth2 there are Implicit, Password, ClientCredentials, and authorizationCode.
If security is globally authorized, all operations which have taken security as a requirement are authorized or else you can individually authorize an operation.
Servers
Servers defined in the specification which are Global level or specific are displayed here. In path item level you can define another server.
Paths
In paths the operations are categorized into fields which are Request, Response and Try it out displayed separately.
Try it out
You can access Try it out in Paths then inside of operations. In Try it out in components you can send a request and see what the response is that happens. You can provide parameters such as status, and Response type in Try it Out then press Execute.
If parameters are required, then you must provide values to those fields.
Then Responses are displayed with Curl, Request URL, Server responses, and Response header.
Components
Components are displayed separately in below categories:
SCHEMAS, PARAMTERS, LINKS, RESPONSES, HEADERS, REQUESTBODIES, CALLBACKS, PATHITEMS, EXAMPLES and SECURITYSCHEMES.
Diagnostics
Diagnostics which are critical bugs, issues in the code, and unwanted things in the code are detected in diagnostics tab with the line number in real time and you can navigate it in the code editor by clicking in the diagnostic.
You can search for a diagnostic as well from the search field on top.
In Xapi we are allowing users to commit with diagnostics in the API but it is the responsibility of the API designer to not commit API which breaks the code.
History
In the history tab you can view past commits to the API, merges to the API, and status changes of the API ticket.
View History Item
You can view the code in view only mode in the editor of any history item by clicking Open in Editor from 3 dot menu of you desired history item. Only Preview and Diagnostics display in the that Editor View.
Comparison
In to do and design in progress statuses you can commit your API after making changes. These commits can be accessed again through the History tab. Xapi provides comparing features with different commits and versions.
When press open commit in an item is history tab, you can compare with the previous commit.

To compare choose your desired commit or version from history tab then click the option of your requirement.
- Compare with Latest one
- Compare with another history item
- Compare with another version
- Compare with initial commit Not available in initial commit
If you select Compare with another history item, then a list down appears with all the history items then select the desired item.
If you select compare with another version a list down appears with all the versions of your API then select the desired version.
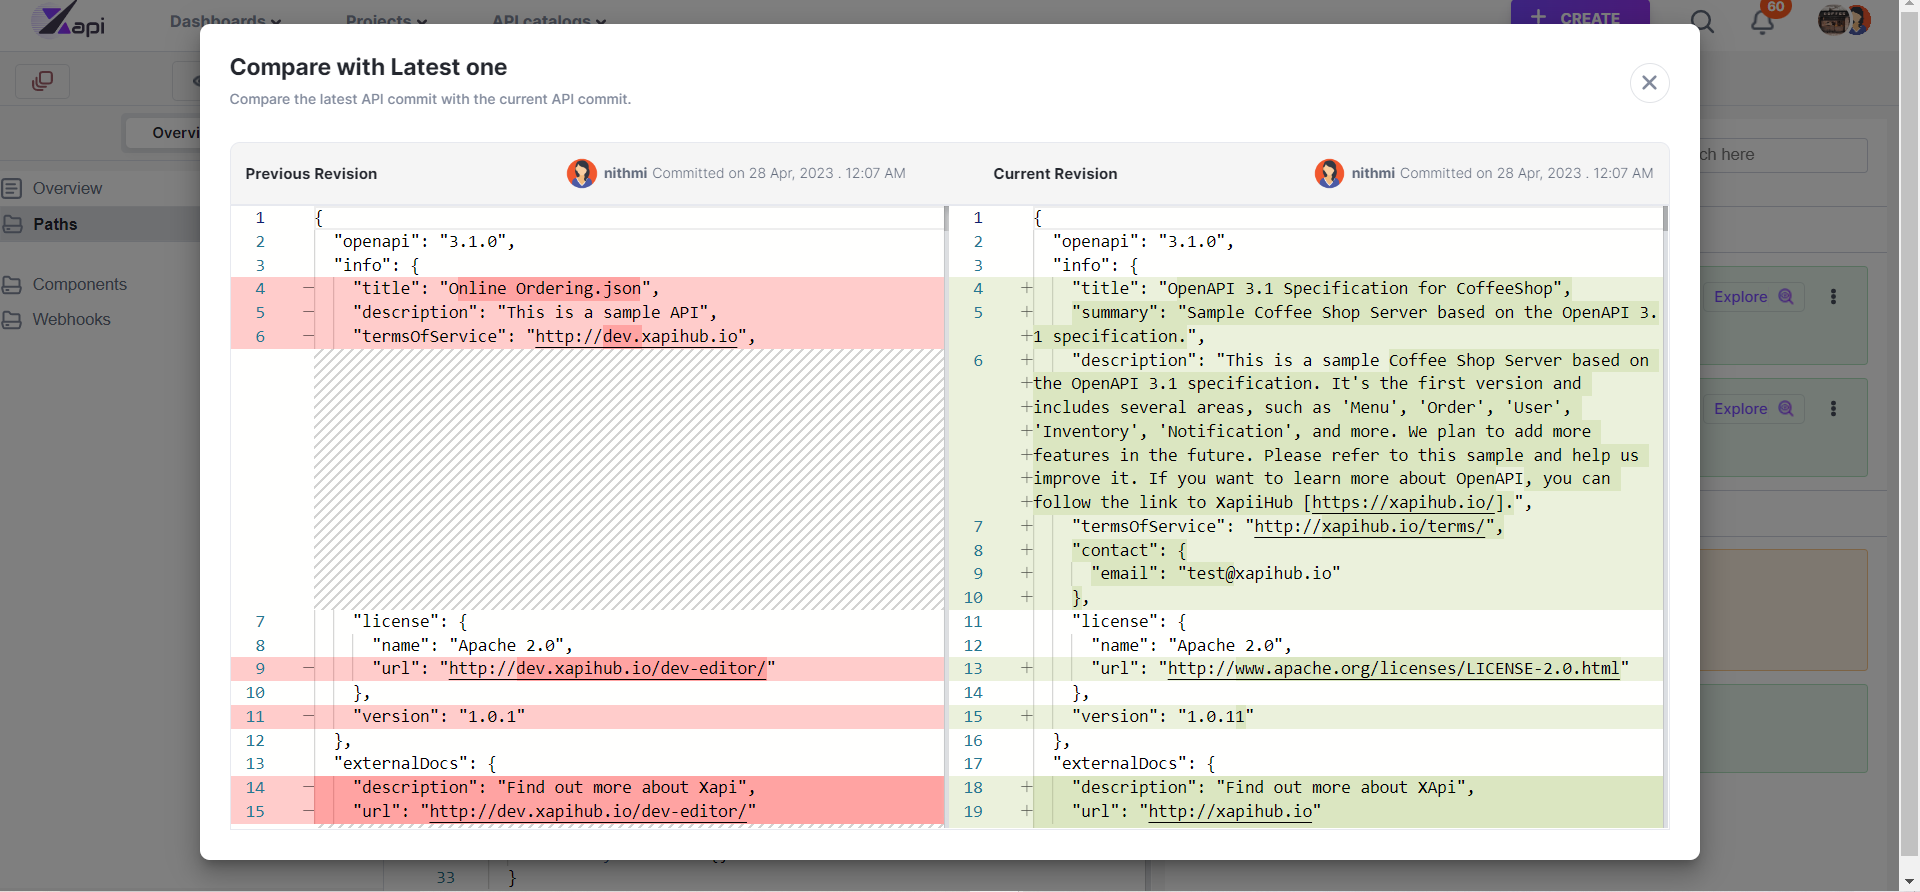
Then a window displays your selected item and desired item side by side and changes in codes are highlighted.
