Creating APIs
The organization owner, organization admins, API designers, and API reviewers can create API designs in authorized organizations and projects (if exist). Depending on the created location, the API will be visible in the corresponding catalog.
You can either create API designs from scratch or import a predefined API design.
Before you begin:
- Sign in to Xapi.
- Navigate to the organization or project where you wish to create your API design.
Manually creating APIs
To create a new API:
-
On the top bar, click CREATE > API > New API.
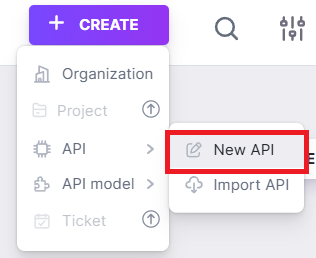
Note that the New API dialog appears.
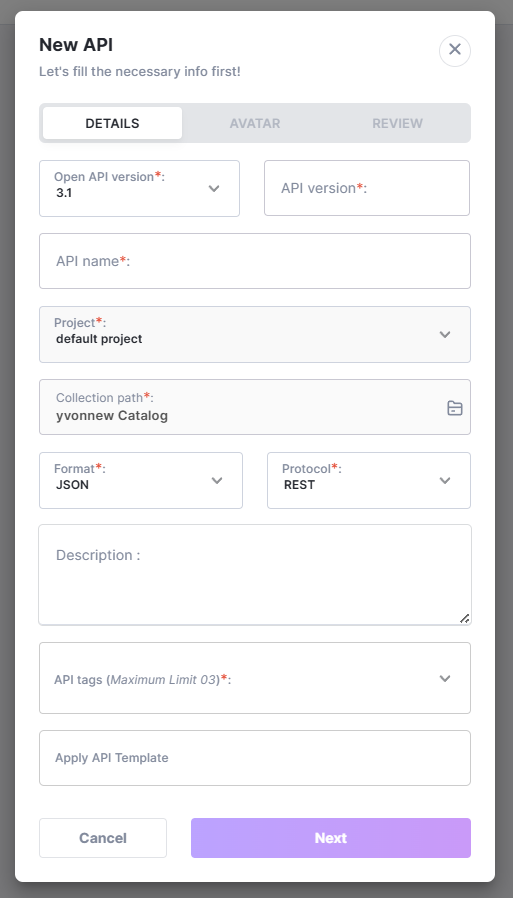
-
Under DETAILS, enter API details as given below.
📃Note: Fields marked with an asterisk (*) are mandatory.
Field Description Sample Value Open API version* This is the OpenAPI specification version that will be applicable to your API. 3.1API version* This is to identify the API version. 1.0API name* This uniquely identifies the API within the corresponding catalog. OrderManagementAPIProject* This identifies the project under which the API is created.
💡Tip:- - If the API is created under a default organization, this will be set to default project.
- - If the API is created under a project, this will be set to the corresponding project name.
default projectCollection path* This is the catalog under which the API is created. Orders CatalogFormat* This defines the format in which your API data will be structured. - - JSON
- - YAML
JSONProtocol* This defines the protocol that your API will use to communicate. - - REST
RESTDescription This describes your API purpose. This is a private API located in the Orders Catalog.API tags* This is to classify your API. Depending on the tags selected, the API can be filtered in API Hub. FoodApply API Template This applies a predefined API template for your API. RESTful CRUD API Template -
Click Next.
-
Under AVATAR, you may either upload an avatar or select an existing avatar.
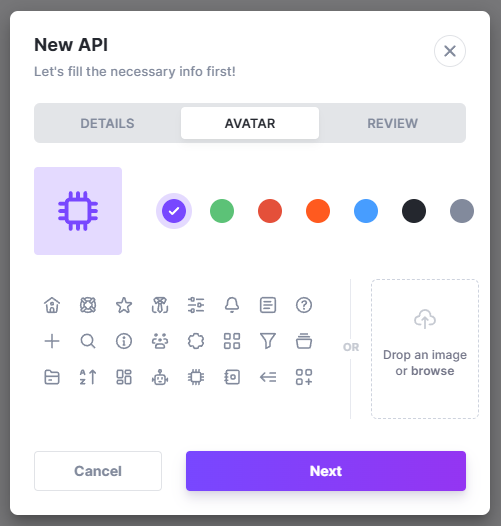
-
Click Next.
-
Under REVIEW, you may review the entered API details.
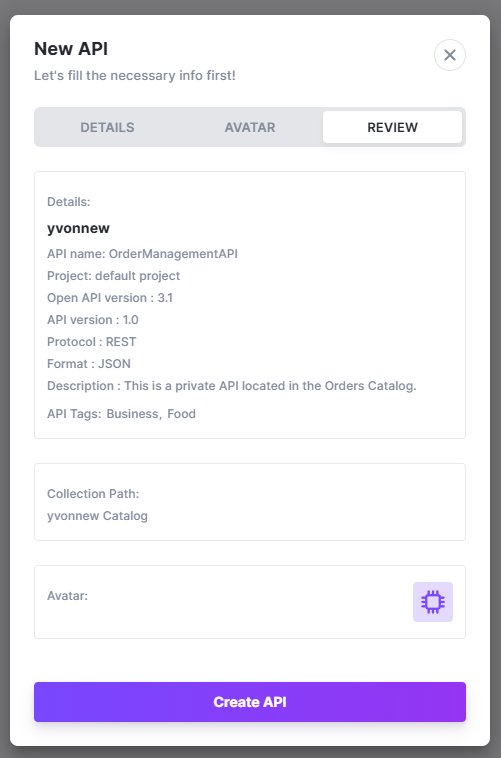 💡
💡Tip: You may change the entered API details by going back to the previous tab.
-
Click Create API. Upon successfully creating the API, note that:
- You will be navigated to the editor view of your API.
- Your new API will appear in the respective dashboard.
- All authoriezd members will be notified via Activity Stream.
Importing existing APIs
To import a pre-designed API:
-
On the top bar, click CREATE > API > Import API.
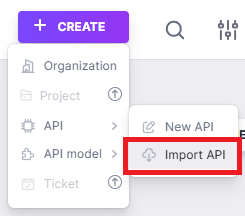
Note that the Import API dialog appears.
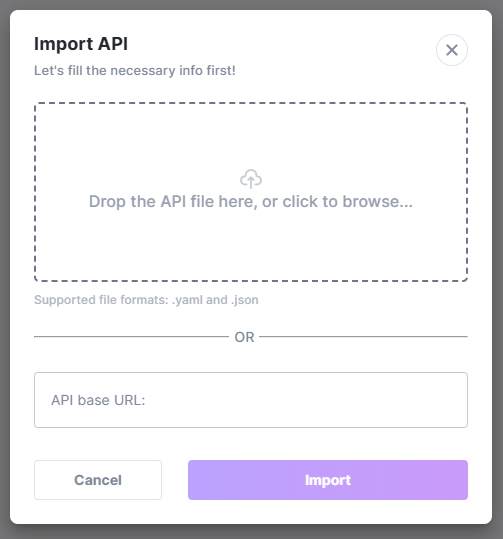
-
You may perform either of the following:
- OPTION A: Drag and drop or browse the API file.
📃
Note: Only the YAML and JSON file formats are allowed.
- OPTION B: Enter the corresponding base URL of the API.
- OPTION A: Drag and drop or browse the API file.
-
Click Import. Note that the New Import API dialog appears.
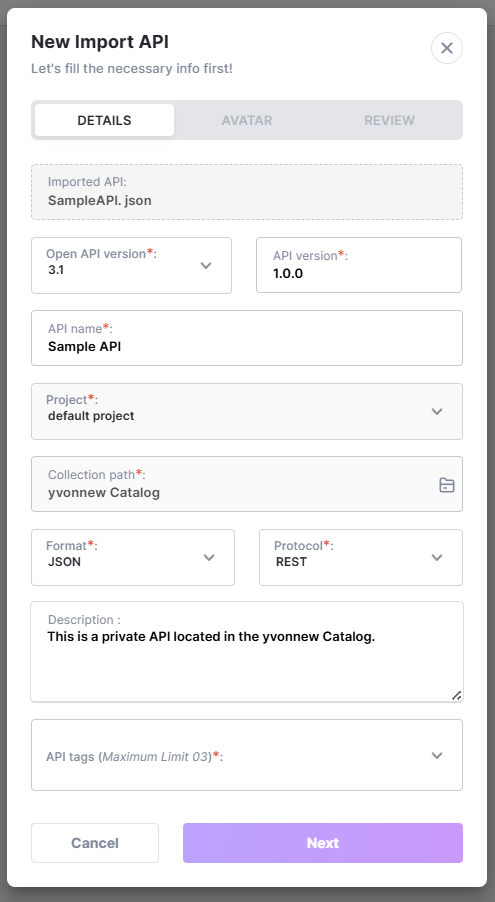
-
Under DETAILS, your may update API details as given below.
📃Note: Fields marked with an asterisk (*) are mandatory.
Field Description Sample Value Open API version* This is the OpenAPI specification version that will be applicable to your API. 3.1API version* This is to identify the API version. 1.0API name* This uniquely identifies the API within the corresponding catalog. OrderManagementAPIProject* This identifies the project under which the API is created.
💡Tip:- - If the API is created under a default organization, this will be set to default project.
- - If the API is created under a project, this will be set to the corresponding project name.
default projectCollection path* This is the catalog under which the API is created. Orders CatalogFormat* This defines the format in which your API data will be structured. - - JSON
- - YAML
JSONProtocol* This defines the protocol that your API will use to communicate. - - REST
RESTDescription This describes your API purpose. This is a private API located in the Orders Catalog.API tags* This is to classify your API. Depending on the tags selected, the API can be filtered in API Hub. FoodApply API Template This applies a predefined API template for your API. RESTful CRUD API Template -
Click Next.
-
Under AVATAR, you may either upload an avatar or select an existing avatar.
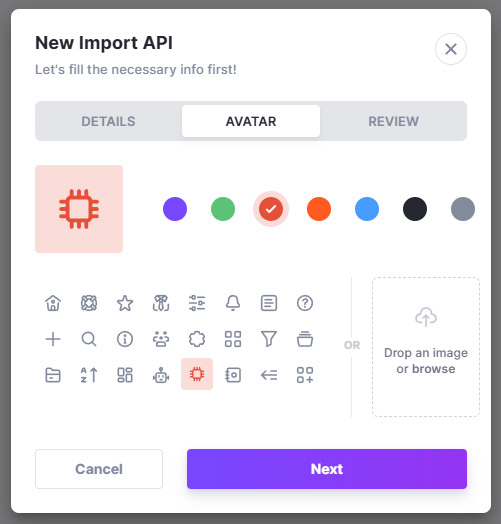
-
Click Next.
-
Under REVIEW, you may review the entered API details.
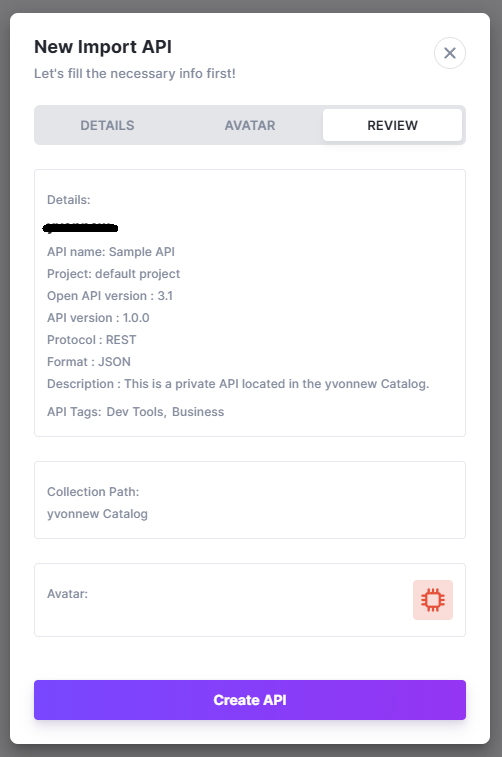 💡
💡Tip: You may change the entered API details by going back to the previous tab.
-
Click Create API. Upon successfully creating the API, note that:
- You will be navigated to the editor view of your API.
- Your new API will appear in the respective dashboard.
- All authoriezd members will be notified via Activity Stream.
